
These experts helped us to
create our product content:
Vital Plus X5 Review
All of the Vital equipment has at least two names. The A920 / Plus X5 is the countertop terminal option in the Vital line. Whether you see it called the A920 or the Plus X5, it’s the same device. For the purposes of this review, I’ll call it the Plus X5, as that is what the equipment owner (TSYS Merchant Solutions) officially calls it.
With access to the robust Vital Back Office portal, the X5 is a great choice for businesses that don’t need or want a full POS system but want a reliable countertop solution. The X5 features a color touchscreen and runs on an Android operating system.
I had the opportunity to personally test the X5 and found it to be an intuitive machine in a sleek, lightweight package. In this review, I’ll cover the X5’s features, costs, and limitations.
Looking for the full Vital POS systems? Check out our Select X8 / Select E13 Vital POS review!
Or, if a smartphone reader is more your speed, get the details on the Vital Mobile card reader.
Setting up the Vital Plus X5
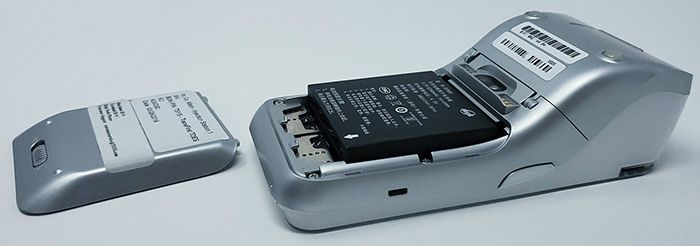
The Vital X5 includes a rechargeable battery. It takes a few hours to charge, but the device comes with a USB charging cord that can be used with the included wall charger.
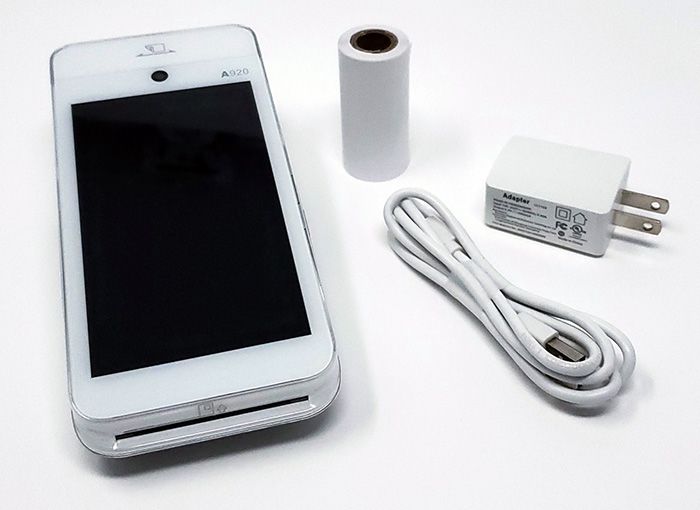
You can use the system plugged in or wirelessly with the charged battery.
The first thing to know about Vital is that the entire family of equipment uses the same back office “portal” and point of sale app. That’s great for syncing data among multiple devices, and makes it easy to switch between different hardware.
However, it does mean that you’ll have to explicitly tell the app on each device to use the integrated features of that device. For example, if you have the Vital X5 and want to use the built-in scanner, you’ll need to go into the settings from the device itself and check off the box for the scanner.
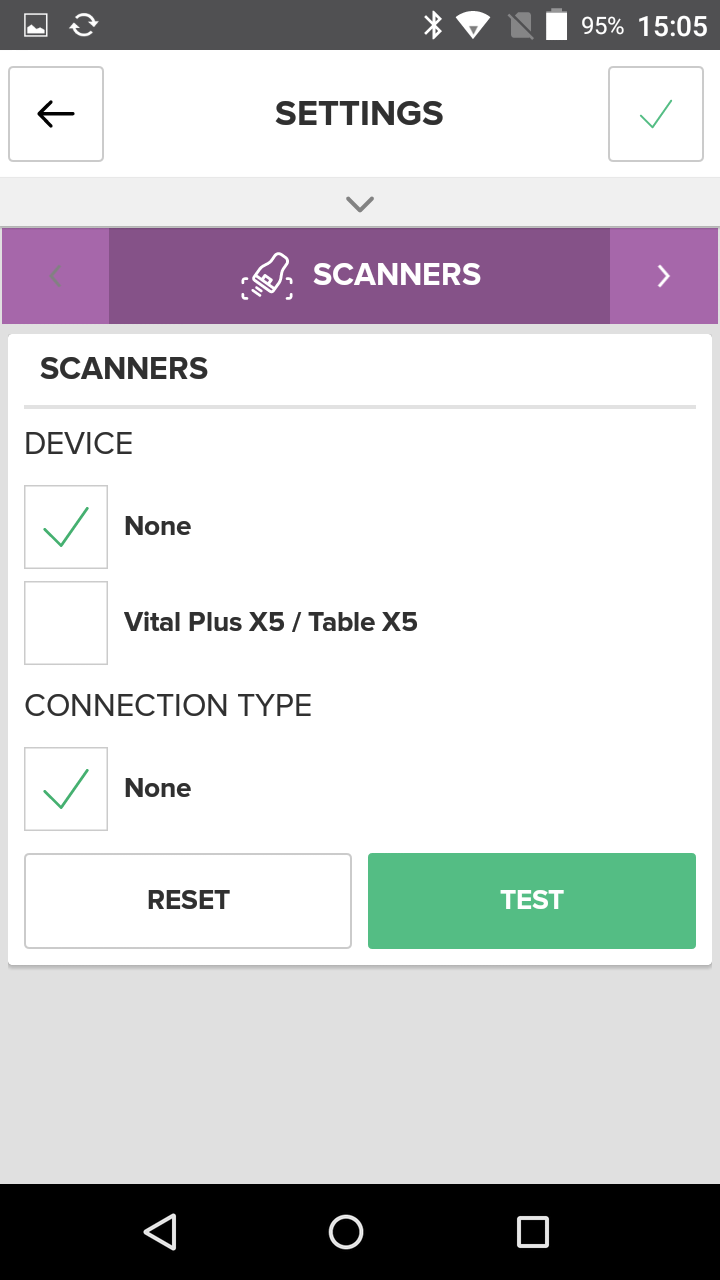
It’s not a difficult or time-consuming task, it’s just something to be aware of. If a particular aspect of the machine isn’t working as you’d expect, be sure to check that you have it set to use the device’s built-in features. This goes for the card reader, barcode scanner, and printer.
If you choose to take advantage of Vital support team training, the tech support rep will help you set up the devices to ensure they’re properly configured. Vital training is available for any Vital device. (Or multiple devices.)
Hardware
The Vital Plus X5 runs on an Android operating system. The handheld unit has a built-in barcode scanner, built-in printer, and built-in card readers for accepting magnetic strip or EMV chip cards as wells as contactless payments.
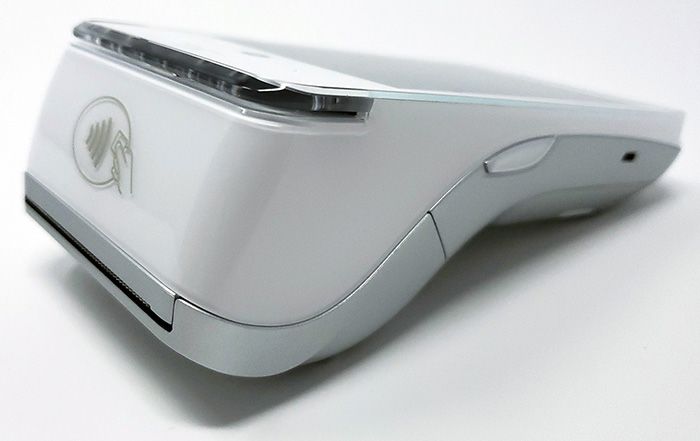
The magstripe reader and NFC reader are located at the top of the device, as seen in this image.
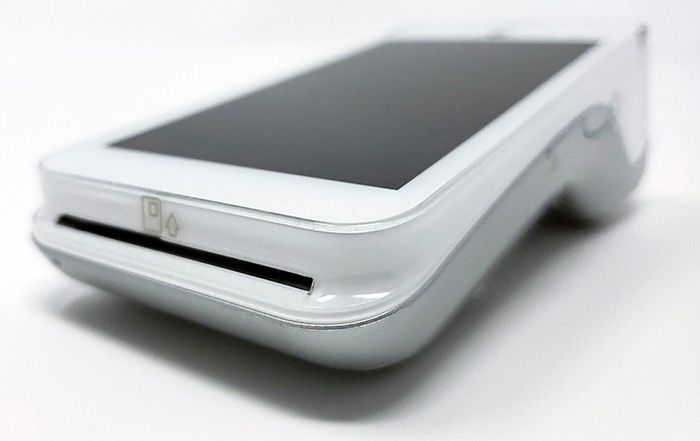
The EMV chip card slot is located at the bottom, as seen here:
The built-in receipt printer is also located at the top of the machine. You can load paper by opening the back of the terminal. The device comes with paper to get you started. You can reorder additional paper through Vital.
Back Office and App
An important thing to know about Vital is that while the Back Office management portal and point of sale app work seamlessly, they are technically two separate components, and you do need to sync the device after you make changes. If you add an item to inventory, add a user, change settings or do anything else in Back Office, make sure to sync the device. If you’re using multiple Vital devices on the same merchant account (with the same Back Office portal login) sync each device.
As a countertop terminal, the X5 has more features than the Vital Mobile, but not quite as many features as the full Vital POS systems. Let’s take a look at what the X5 can do, and what it can’t.
Vital Back Office
When it comes to payments, the Plus X5 is closer to the Vital Select POS system than the Mobile readers. In fact, there is only one payment function that the POS systems can do that the X5 can’t – cash drawer management.
The X5 does not offer options for managing cash within the machine. However, that means it does offer a whole range of other beneficial features.
You’ll be able to accept multiple types of payment (including card, cash, and check) as well as split those payments or split the order by item.
You can also enable gratuities, including adjusting tips after the card is run – an important feature for sit-down restaurants. The X5 supports full and partial refunds and lets you run reports on all payment-related transactions, from total sales to discounts given to taxes collected.
Speaking of discounts and taxes…
Offering Discounts
Discounts and taxes are two areas where the X5 offers the exact same functions as the full POS system. When it comes to discounts, you have the choice of creating a manual discount at checkout for an individual customer, or setting item-level or order-level discounts.
Item-level discounts are great for clearance items or special sales. Order level discounts let you set a fixed discount for a particular group of customers, such as students, military members, or senior citizens. You can set discounts as a percentage off or a dollar amount off.
Taxes
If you’re in a state that has sales tax, you can make it easy on your cashiers or servers by setting tax rates in advance. You can set multiple tax rates if needed, or leave your system set for one tax rate. Additionally, you can manage “tax-exempt” orders to skip adding tax to organizations that are tax exempt.
Managers and those with permission to view reports can see the amount of tax collected for specific time periods or view the tax exempt orders reports.
Employee Management
When it comes to employee management, the X5 is closer to the Mobile, meaning it offers a limited set of functions. Mobile devices and countertop terminals are simply not designed for extensive employee management. If you need more advanced functions like timeclocks, wage calculation, custom pay periods, or shift management, be sure to check out the Vital Select E13 or E15.
However, the X5 does have an important feature enabled: employee permissions. You can create “groups” (such as manager or cashier) and assign your staff to the appropriate group. From there, you can set permissions for the users of that group, ensuring that no one has access to functions that they’re not authorized to use.
For example, if cashiers are not permitted to process full refunds, you can restrict refund capabilities for any user that is assigned to the “cashier” employee group. The X5 also lets you set individual PINs for employee login, enabling you to see which employee conducted specific transactions.
Inventory Management
For many businesses, inventory management is part of the daily routine and the right credit card machine or POS system can help streamline the process. Fortunately, the Plus X5 offers quite a few inventory management options. In fact, there’s only one inventory function that is available on the POS system but not available on the Plus X5, and that’s cross-store inventory lookup.
What the X5 does offer is a customizable item catalog / menu setup that allows you to either enter items manually, or import them from a spreadsheet. You can set up categories and subcategories for quick sorting, set price and available by store, conduct physical counts, set low inventory alerts with quantity tracking, and view top-selling item reports.
Let’s take a closer look at items, categories, and subcategories, as this is the backbone of the entire order entry system.
Items
Vital refers to “items” for restaurants, retailers, and service businesses. An item is a single dish, product, or service that a customer wishes to purchase. (E.g. a cheeseburger, sweater, or tech support.)
Your catalog or menu will be made up of many different items, all with prices and titles. You can also enter more information as available / needed, such as your cost, a description of the item or dish, part numbers, and whether you’ll allow partial quantities.
You’ll always enter items into the item library, which is part of the Back Office portal. However, you can access the portal either from an internet-connected computer or through any of your Vital devices.
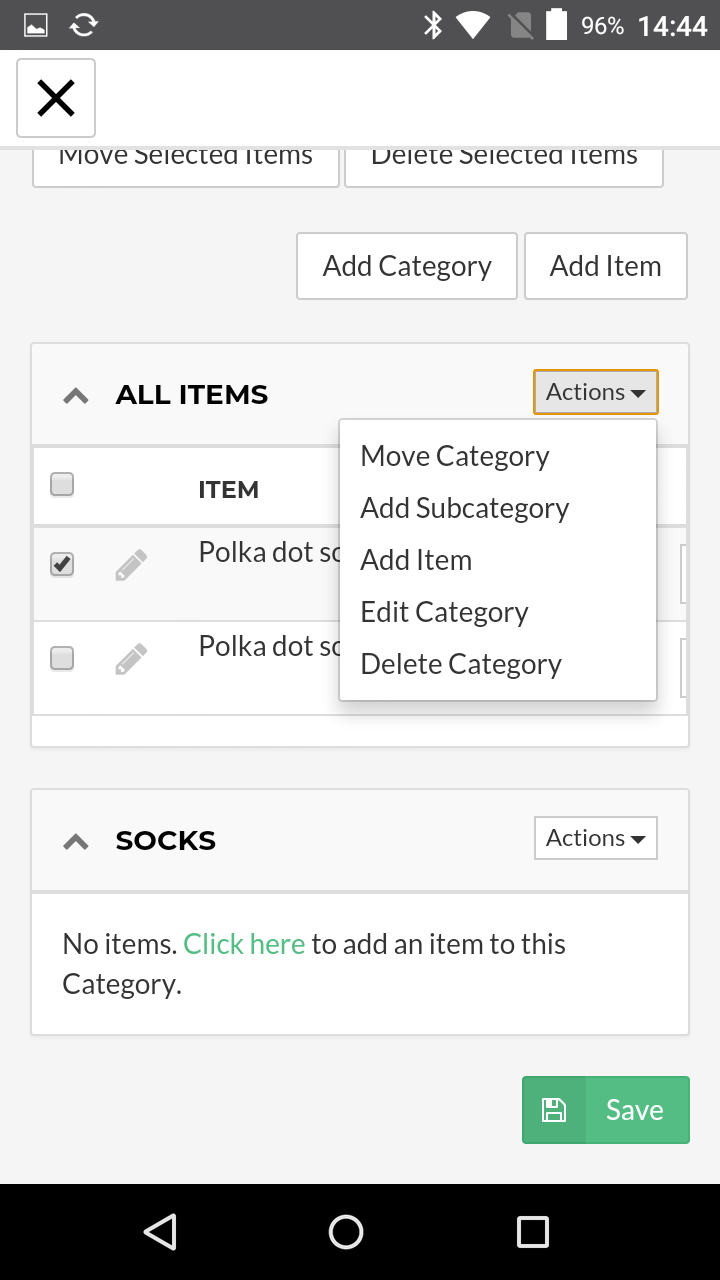
Categories and Subcategories
Categories and subcategories are ways to organize your items for faster entry. As you probably guessed, category is the broad, top-level grouping, with related subcategories under that main category. However, you can be as broad or as specific as you’d like.
For example, a shoe store might list broad categories of “women’s shoes” and “men’s shoes.” They could simply leave it at that, or add subcategories. Perhaps they want to add, “Sneakers” and “Dress Shoes” underneath. But if they want to get more specific, they can. Perhaps the store carries many different styles of brown and black dress shoes. They could create subcategories for “Brown Dress Shoes” and “Black Dress Shoes.”
The same would work for restaurants. While they could keep categories as broad as “Lunch Menu” or “Dinner Menu” they could separate the items beyond that, using subcategories such as “Appetizers,” “Entrees,” “Soups and Salads,” “Desserts,” etc.
Screen Layouts
For some reason, categories themselves don’t show up on the main order entry page of the Vital systems. Instead, Vital displays what it calls “screen layouts.” While you can (and probably should) name your categories and screen layouts the same, they aren’t functionally the same thing.
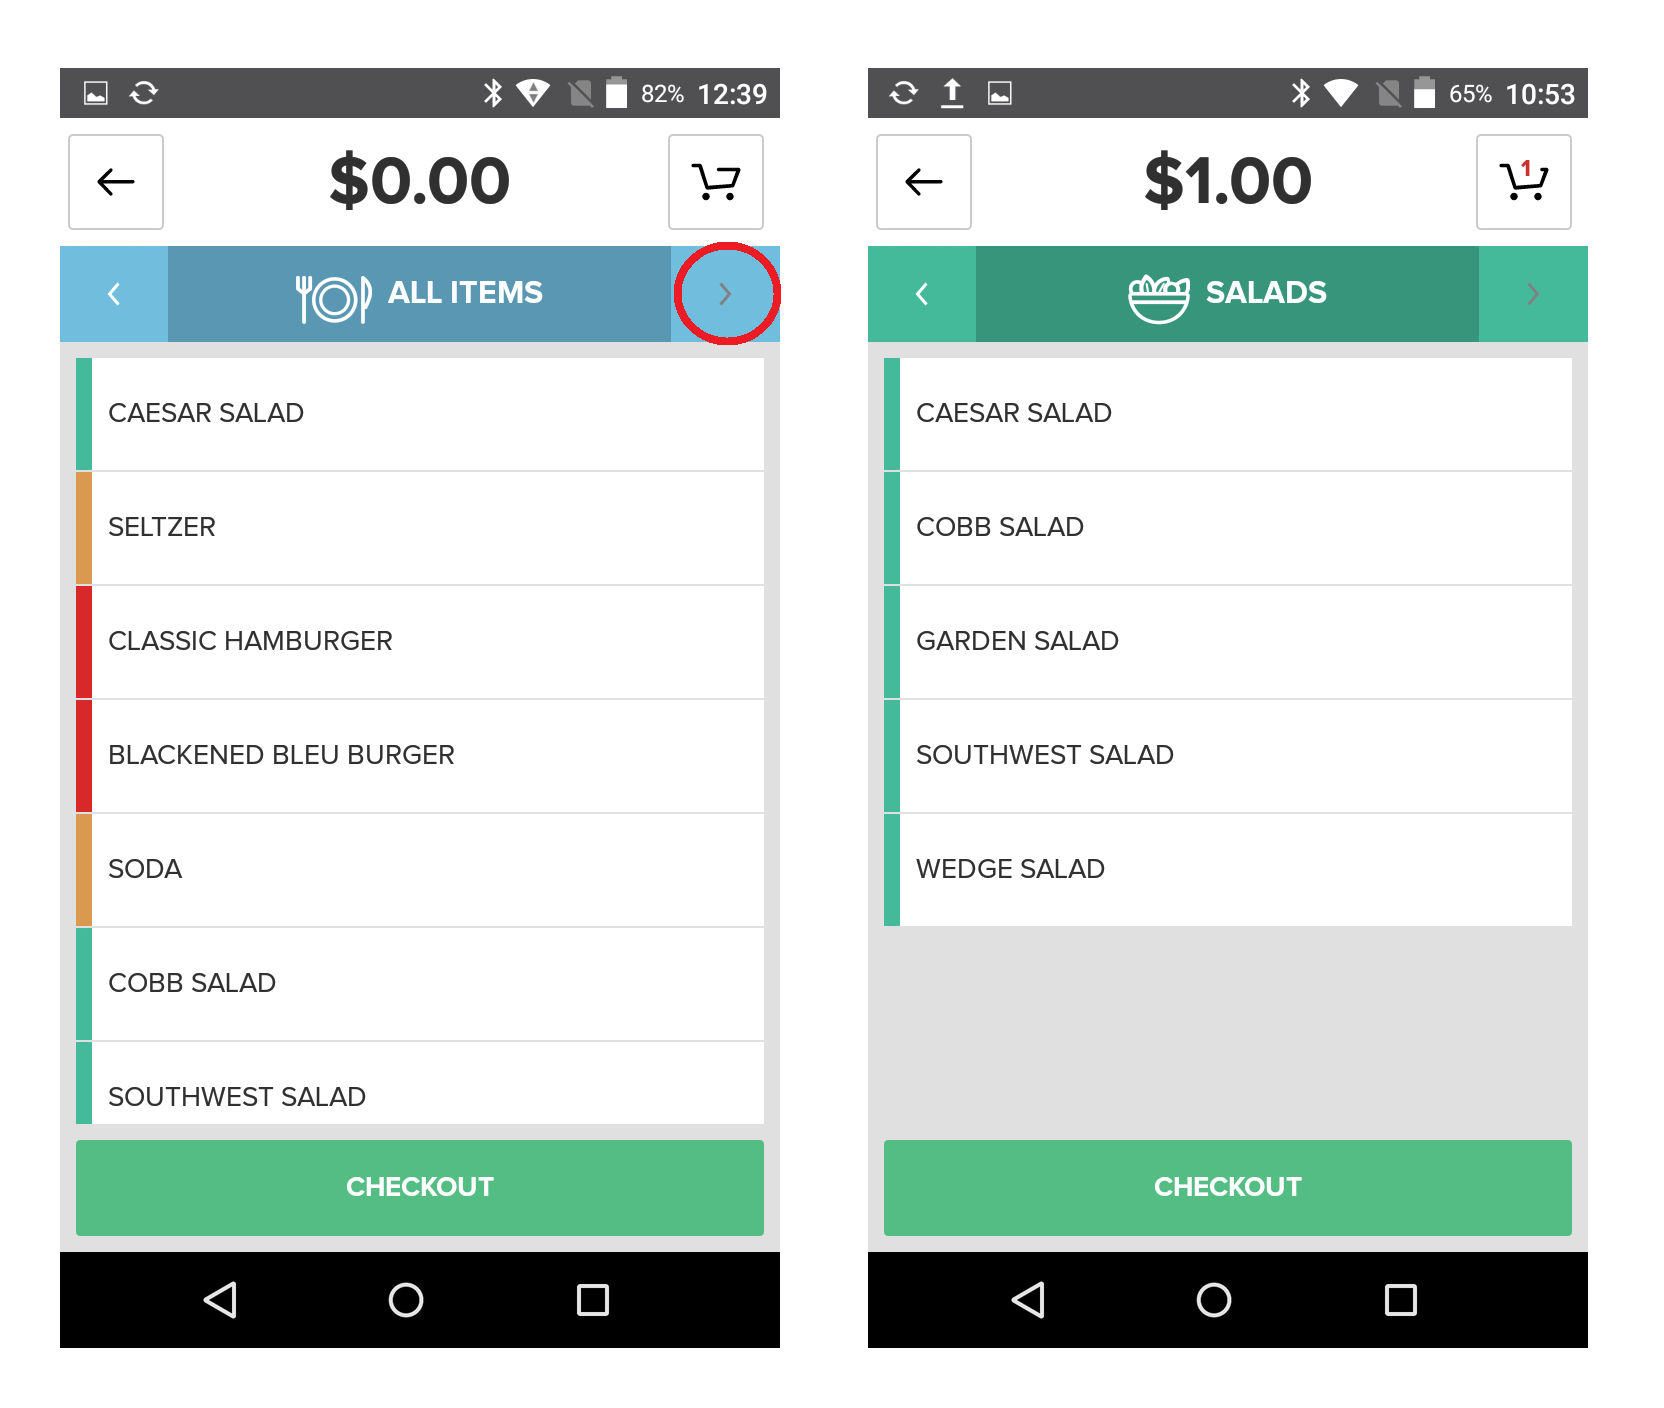
In the screenshot below, I created a category for “Salads” but it was not showing up when I tried to scroll from the “All items” screen. Instead, I only had options to search or enter manually. The right-side arrow to move to other screen layouts was greyed out, because I didn’t have any screen layouts set.
I had to create a “screen layout” for Salads in order to see that as an option to narrow down items to those included in the Salads category. Once I did that, I was able to use the right arrow to navigate to the “Salads” option.
Vital includes an option to automatically create screen layouts that match your categories. If you’re using categories, it’s a good idea to have matching screen layouts for consistency and ease of order entry. However, note that if you enable Vital to automatically create the layouts, it will remove any others you’ve already created. Save yourself some time by not creating the screen layouts manually.
(But whichever option you choose, remember to sync! Syncing is key to using Vital systems.)
In short: A “category” is simply a grouping of related items in your item library, but doesn’t display them as grouped in the POS app. A “screen layout” is a view of related items that will display in the app.
Many businesses will want to include the same items in a category and a screen layout, but there may be situations where you’ll want the screen layout to be more limited. For example, if you run a restaurant that offers different sandwiches at lunch than at dinner, you may create a category for “sandwiches” that includes all the options, but then create two screen layouts: one for “lunch sandwiches” and one for “dinner sandwiches.”
The “All Items” Screen Layout
A quick note: Items are not in a screen layout by default, and you’re not required to add them to a screen layout. However, doing so inherently limits their visibility. If you don’t assign the item to a screen layout, it will not show up in “All Items” by default. Instead, you’ll have to actually search for the item or scan its barcode.
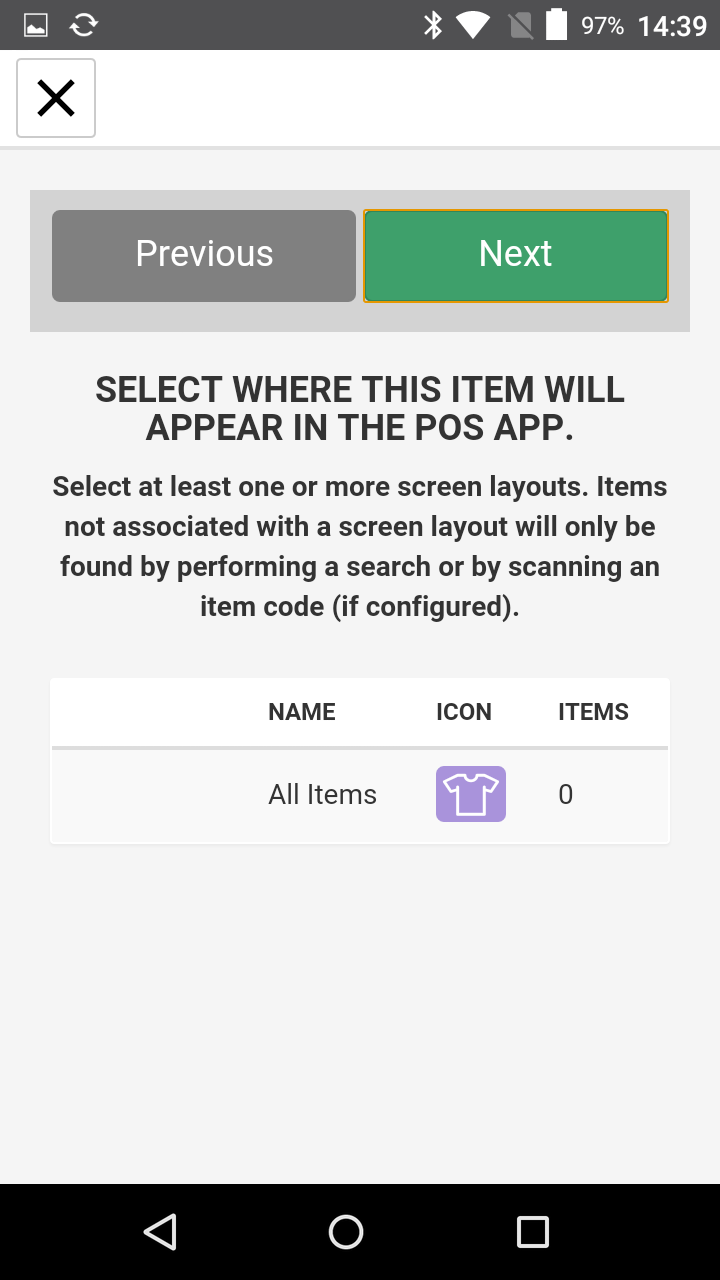
If you want the item to show up outside of manually searching or scanning, you’ll need to add them to both the “All Items” screen layout and any other screen layouts you wish. (Items can be assigned to multiple screen layouts.)
This was an area that tripped me up, because Vital requires a category when adding an item. I can choose the category “all items,” as seen in the screenshot below.
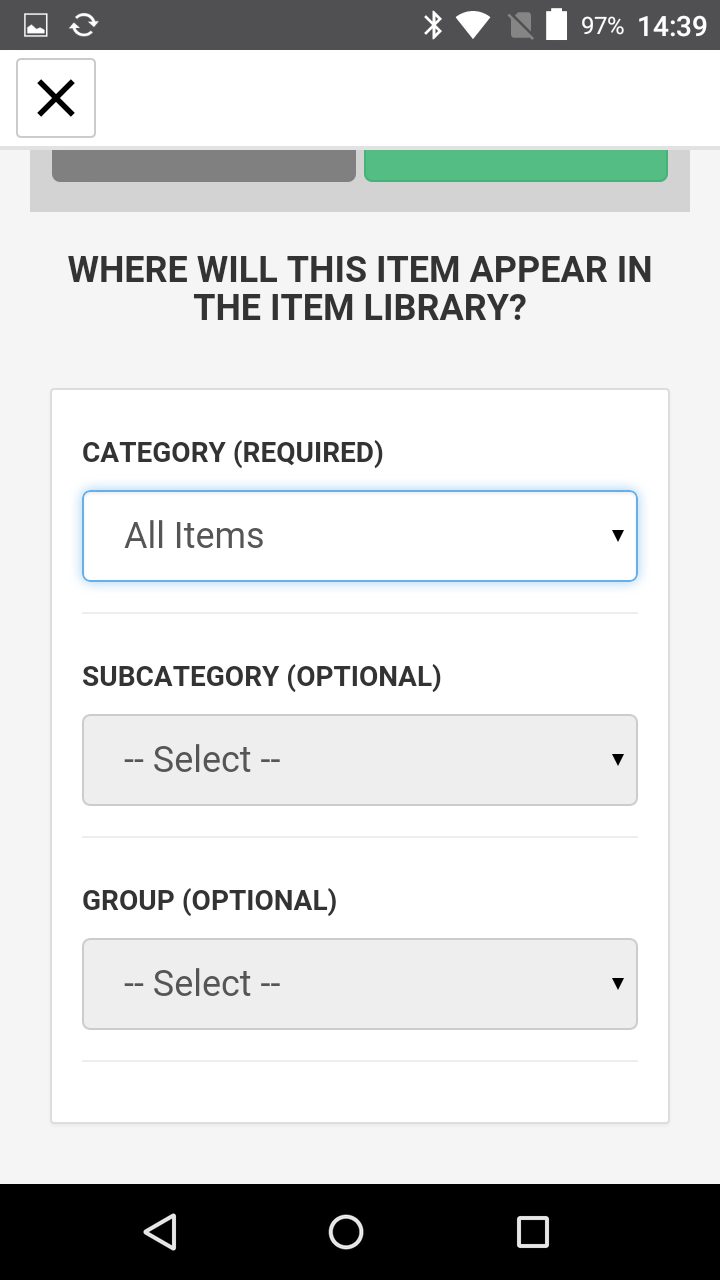
But, as I mentioned, categories and screen layouts are not the same thing. Selecting “All Items” for the category on the item-add page will not make that item appear in the “All Items” screen layout on the Vital device. It simply groups it with other items in that category in your Back Office item library.
Setting Up Items
When I first set up an item library, I did it backwards. I started with individual items, skipping over the “screen layouts” section and not creating subcategories in advance. While it was fixable by simply going into an item and editing its category and screen layout assignments, it did take longer. It meant that I had to go back in and edit each individual item after I’d created it. If I had started with the categories, subcategories, and screen layouts, I would have only had to enter the item once, assigning the correct categories and layouts at the time of entry.
You’ll always have the option of editing individual items, categories, subcategories, and screen layouts. However, if you go into it with a clear plan, you’ll have an easier time. Start by determining your main categories. From there, think of the necessary subcategories. After that, consider how you’ll want items to be grouped in the app itself, and either create your screen layouts, or allow Vital to create them to match your categories.
Then, once your main category and screen layout structure is in place, add individual items. Assign them to as many categories and screen layouts as they should belong to, but remember, if you’re consistently adding items to multiple categories and layouts, you may be dividing too far. The point of screen layouts is to make it easier to quickly find an item. If you get too specific, it may be difficult to know at a glance where the item will be.
If you need more help with items, Vital offers a dedicated website (help.vitalpos.com) with tutorials on all aspects of the systems.
Vital X5 POS App
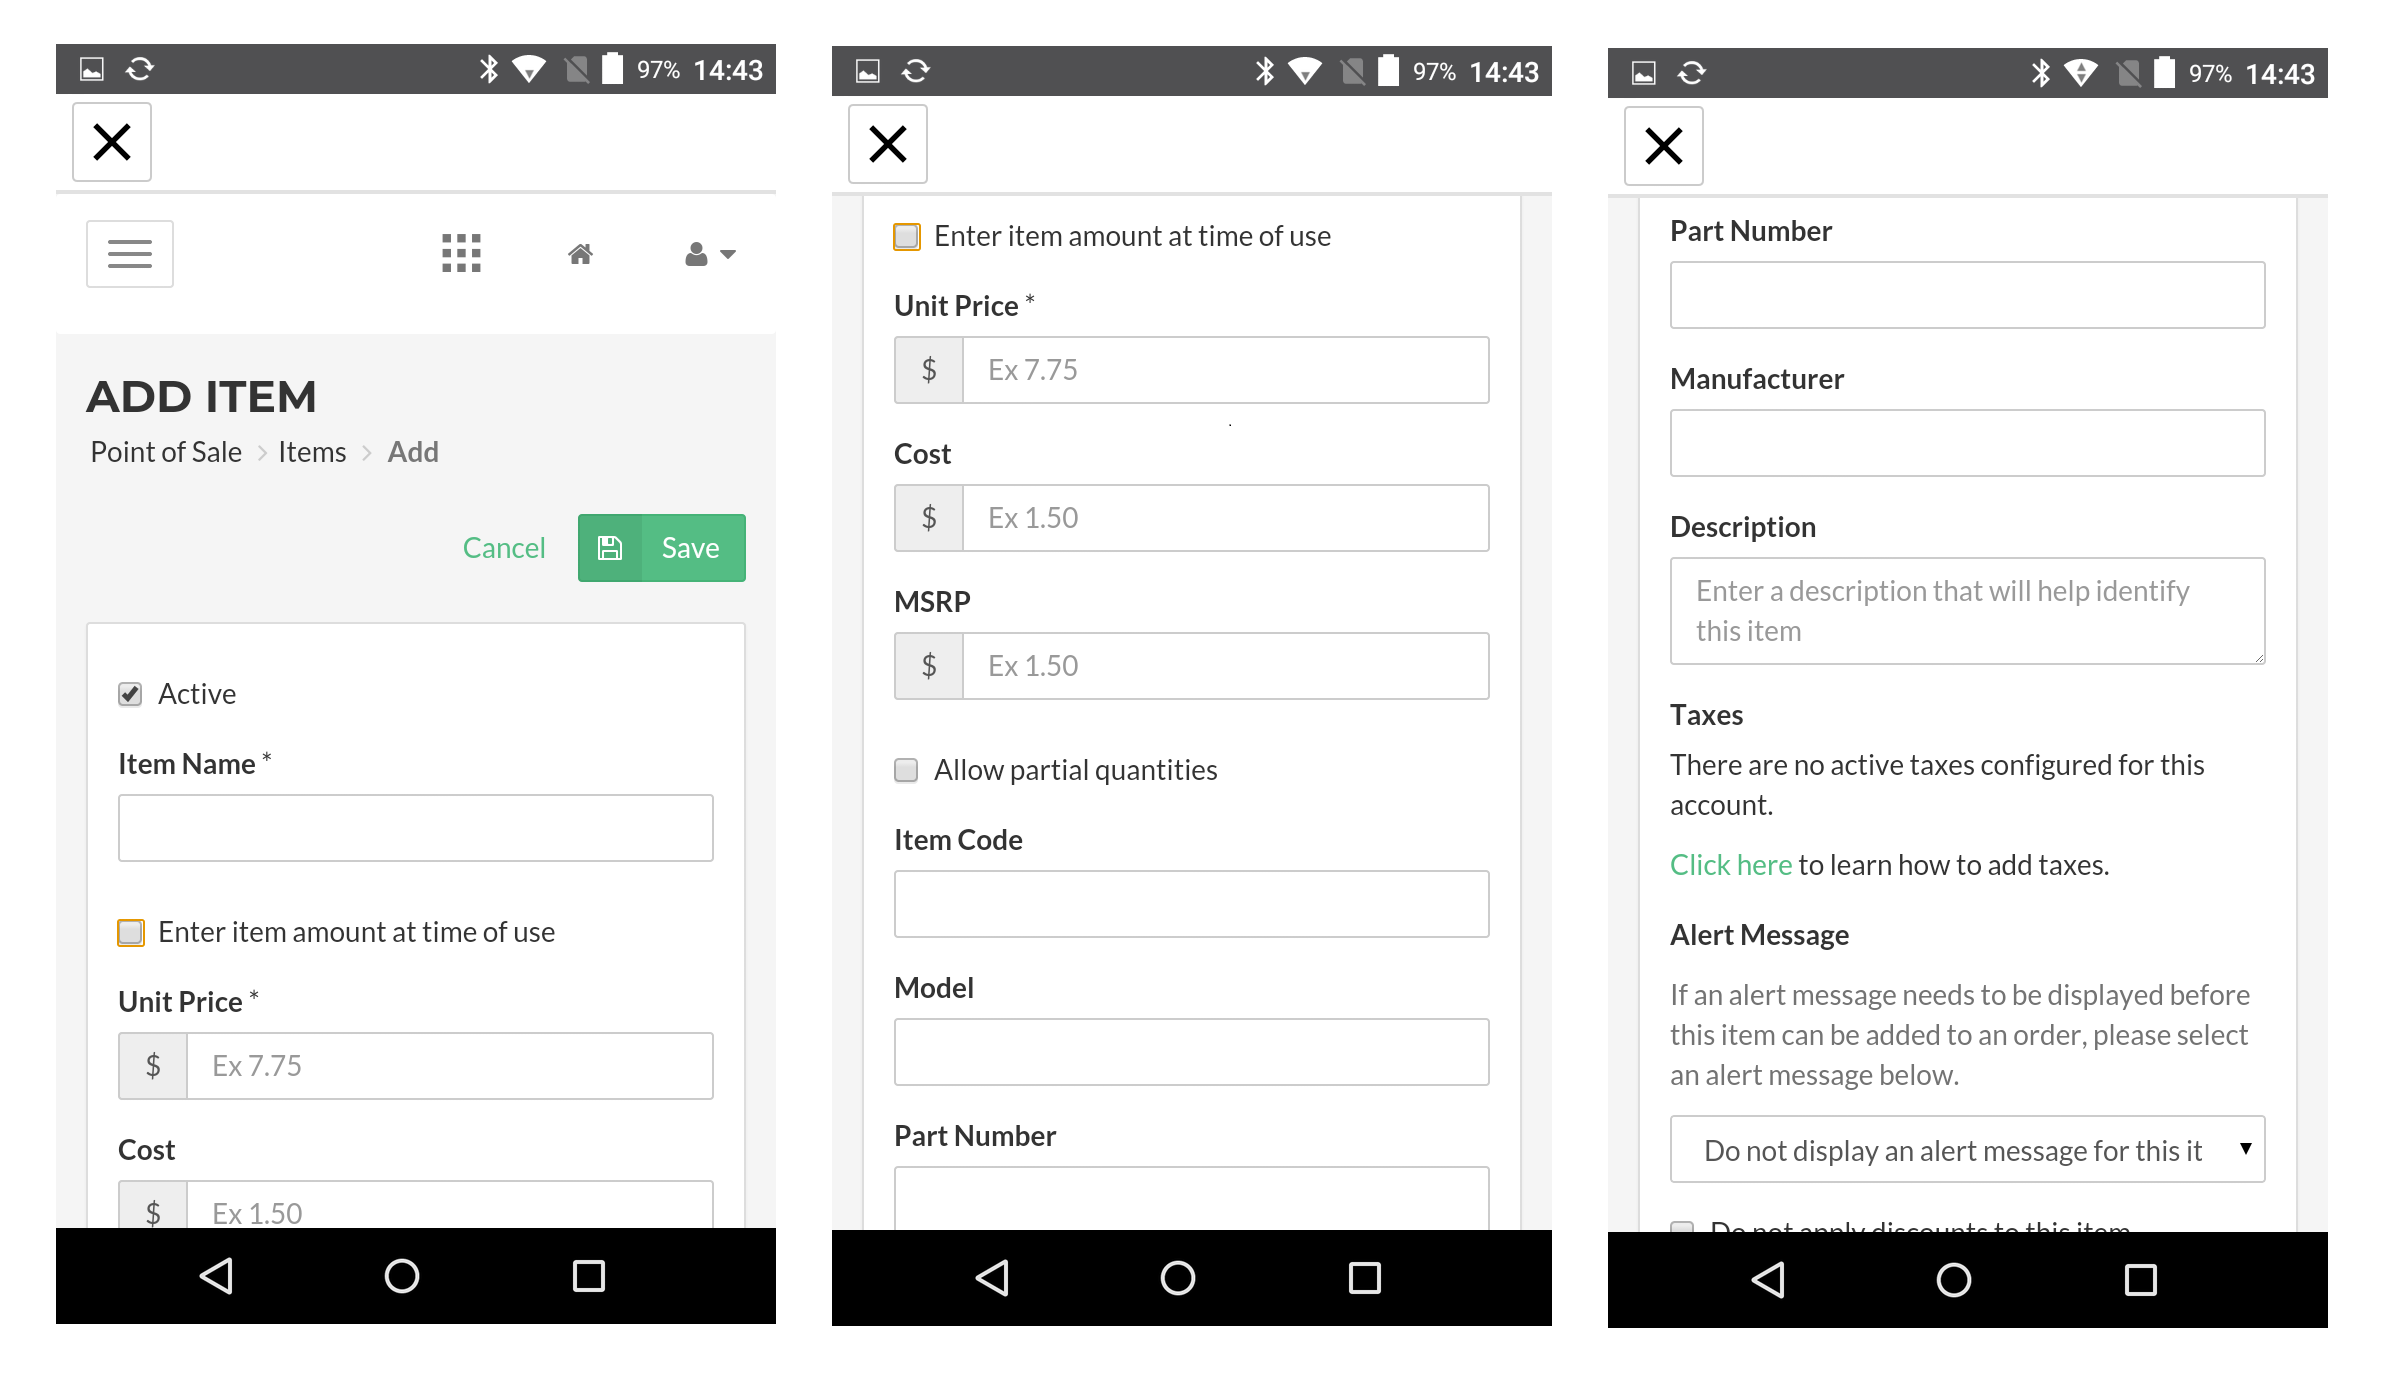
The Vital POS app is where you (and your staff) will actually perform sales. You can browse / search for items in the item catalog, scan barcodes, or manually enter those items.
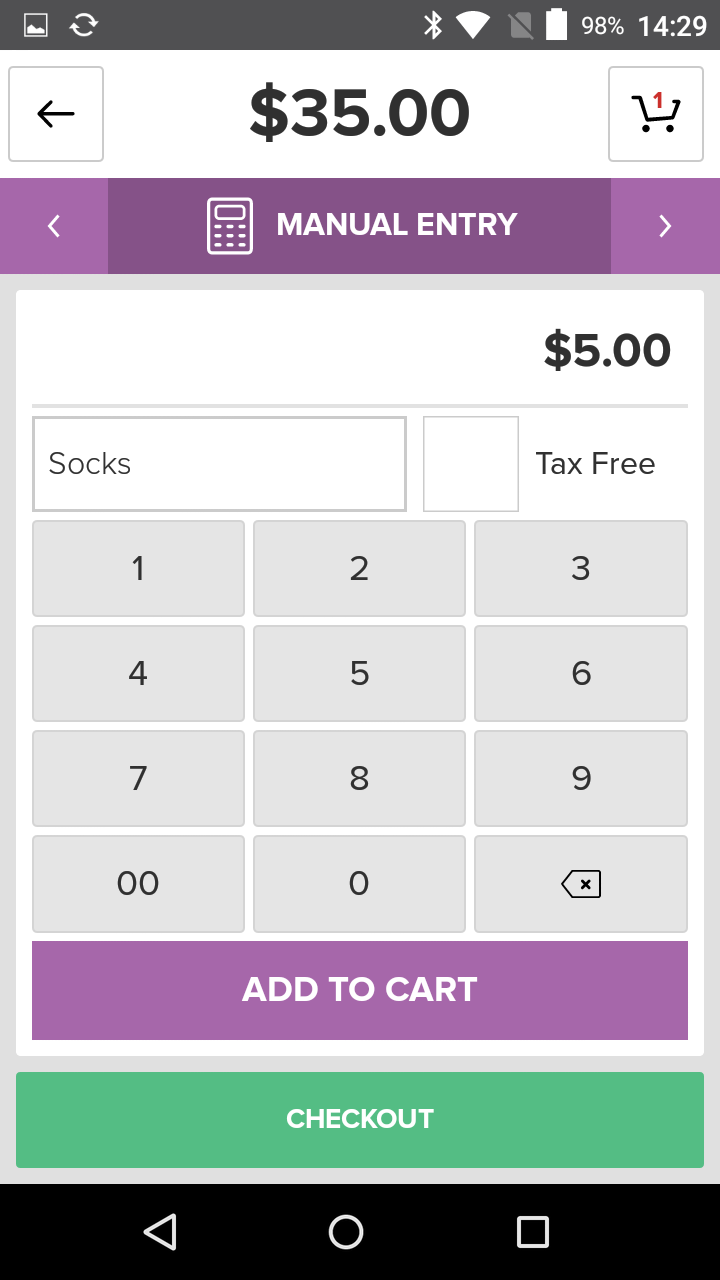
As you can see from the screenshot of manual entry, you’ll need to enter an item name and the price. On the other hand, searching for items will bring up any products or dishes that you already have in your item catalog.

If the item has any special considerations set in the item library, staff will see a prompt to remind them to take an action. Prompts include age restrictions on purchases, allergen warnings, and special order notations.
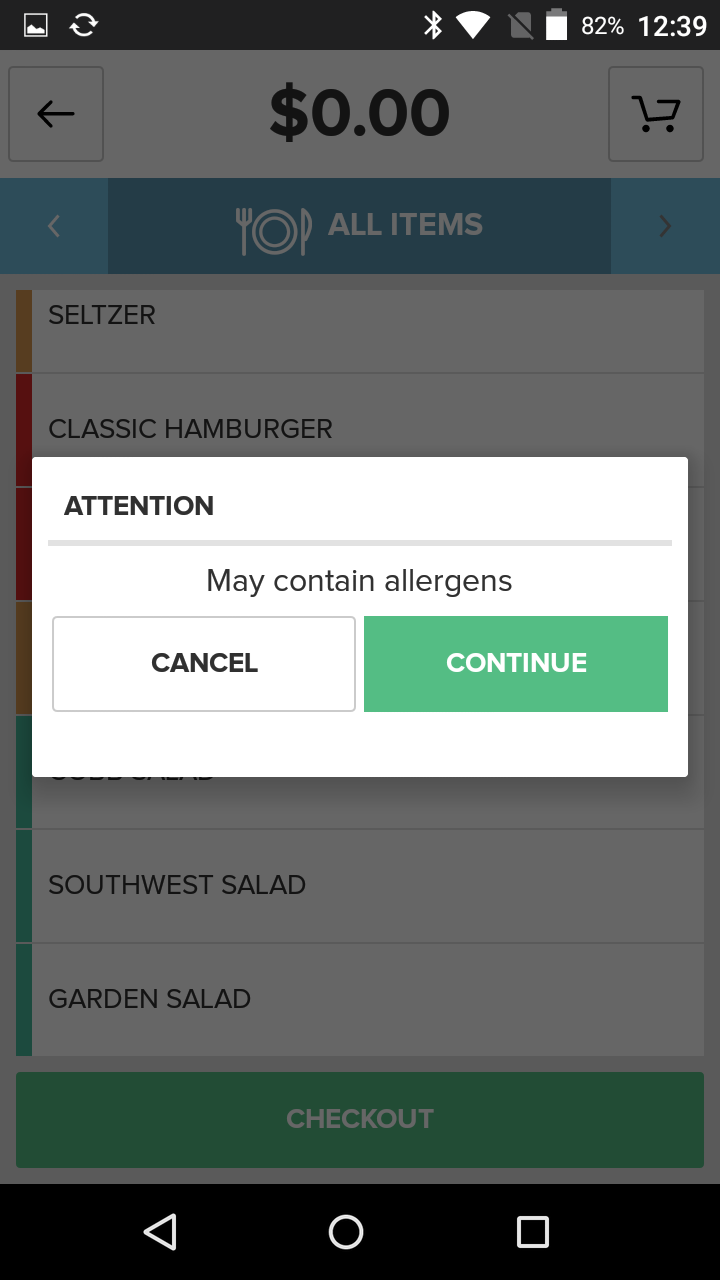
If you set age verification warnings, it will remind your staff to check ID or follow other age verification protocols. The allergen and special order prompts will alert staff that they need to inform the customer of potential allergens or check about order preferences.
Payment
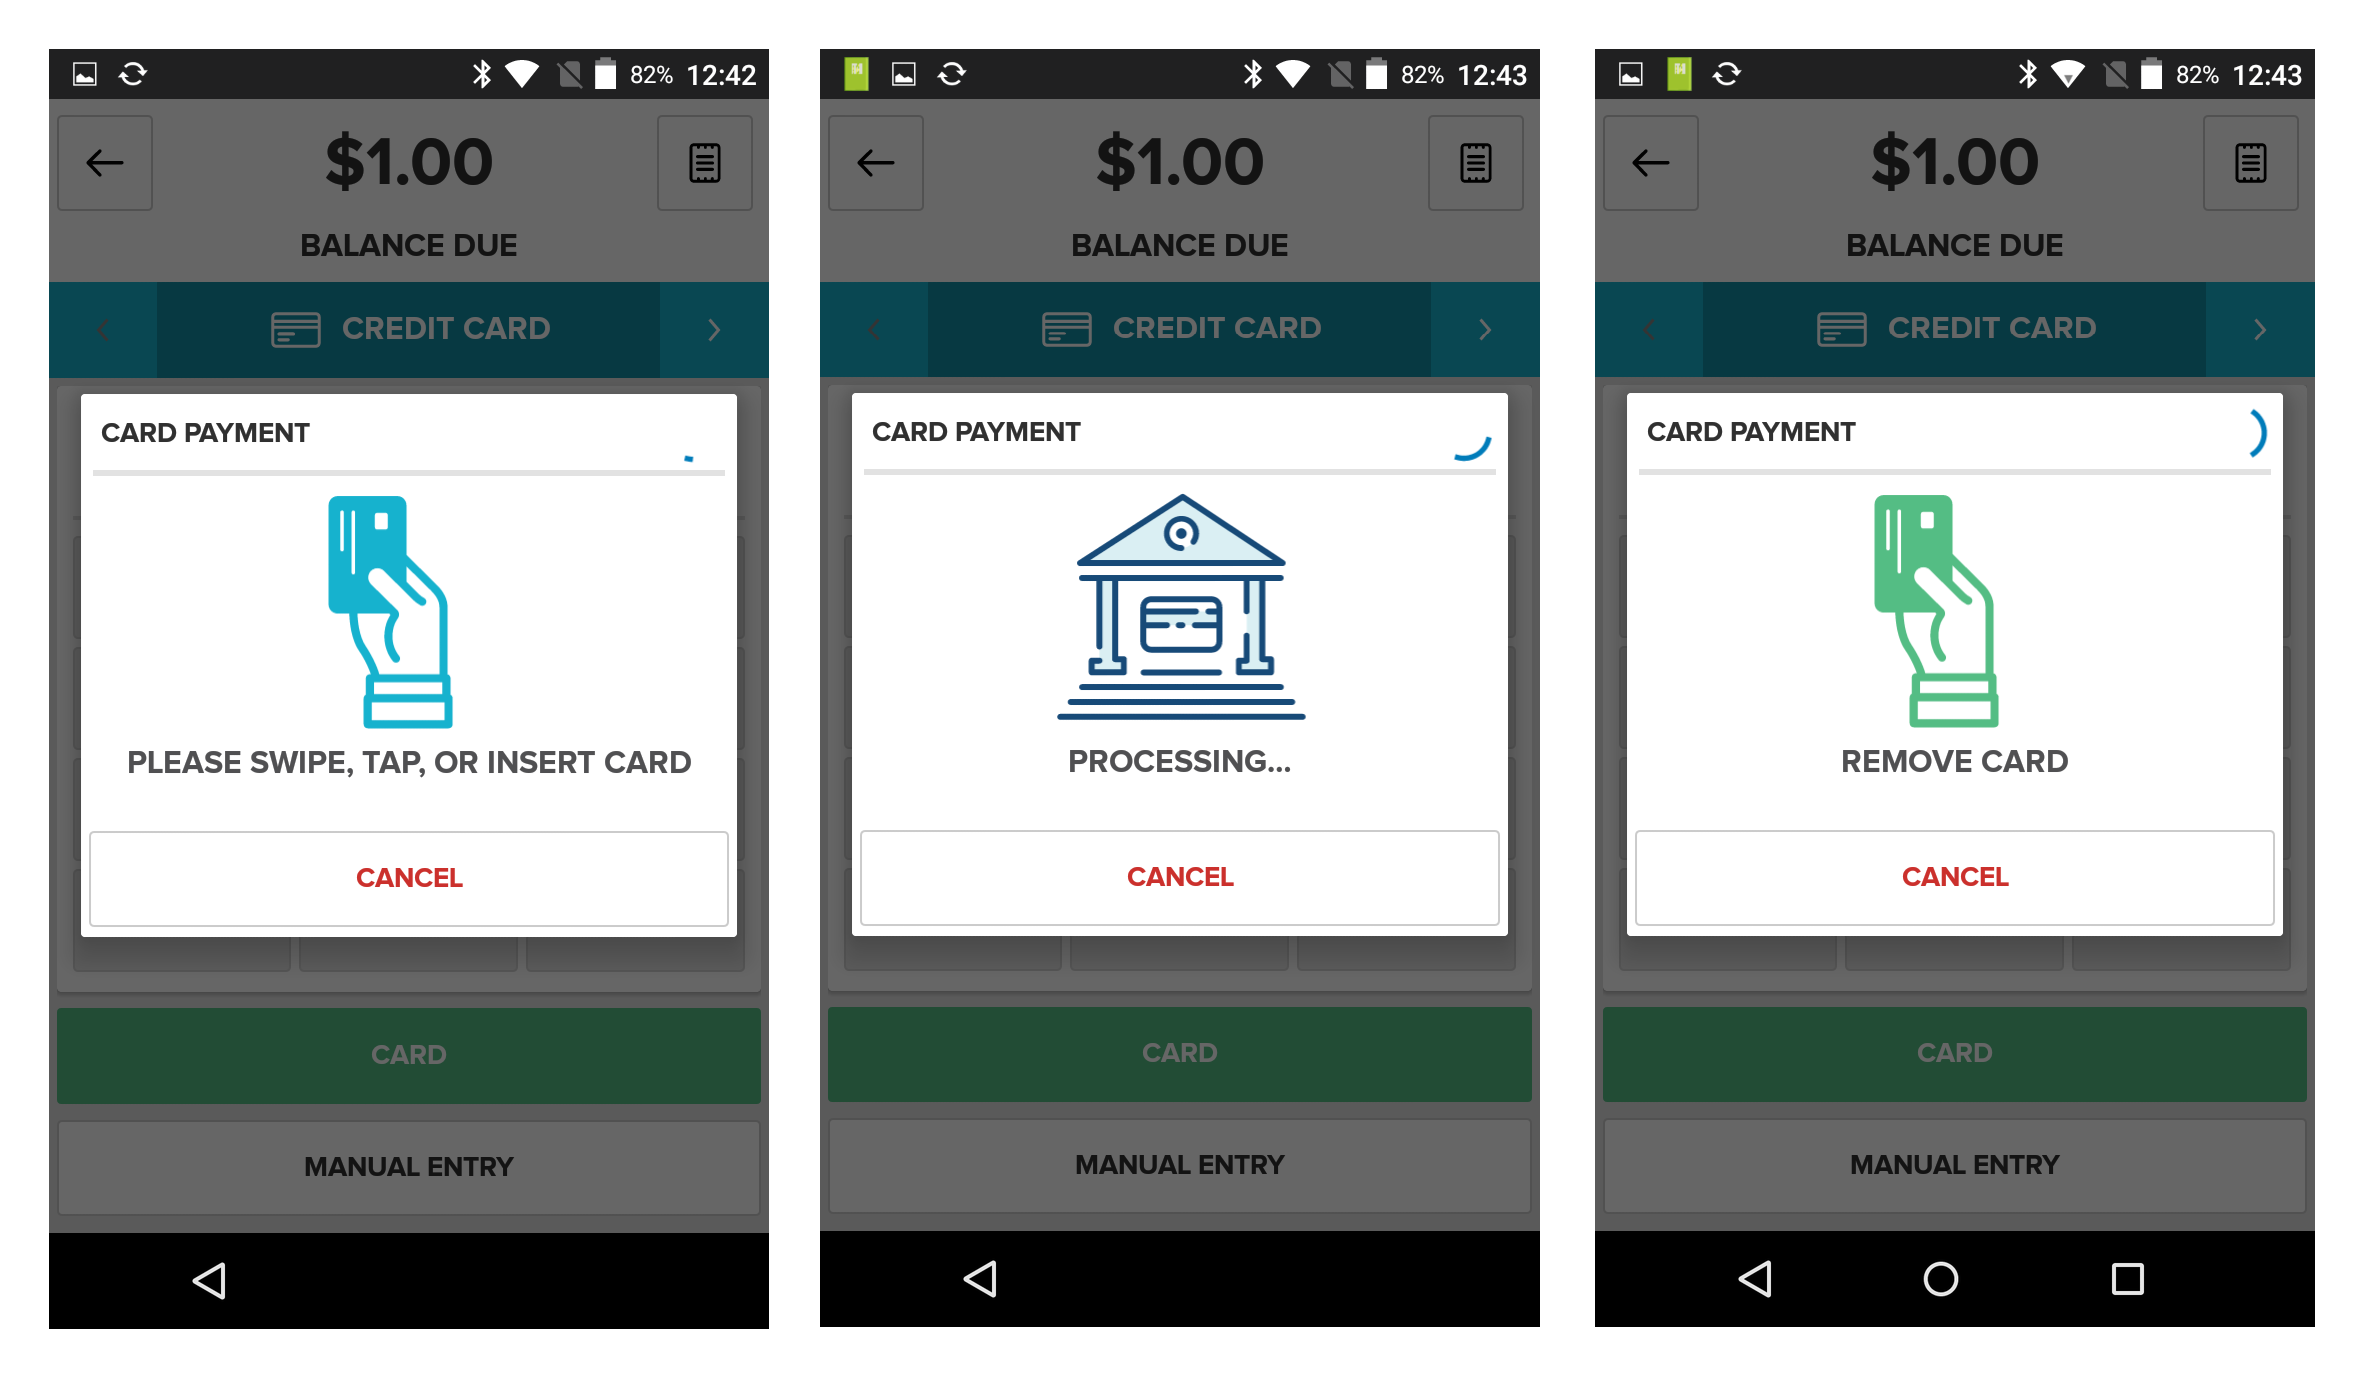
It’s very easy to take a payment on the Vital X5. Buttons for “checkout” and the various payment methods are prominent and the machine will tell you what to do.
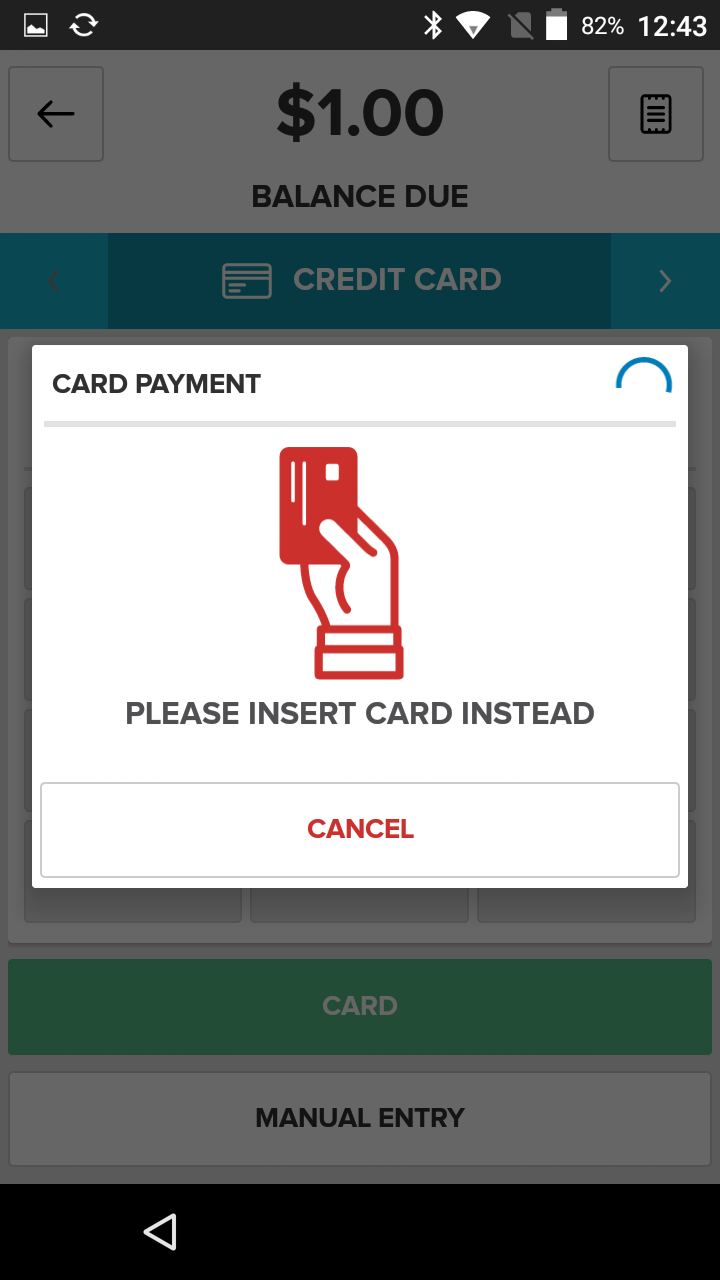
If you swipe a chip card through the magstripe reader, you’ll be prompted to insert it instead.
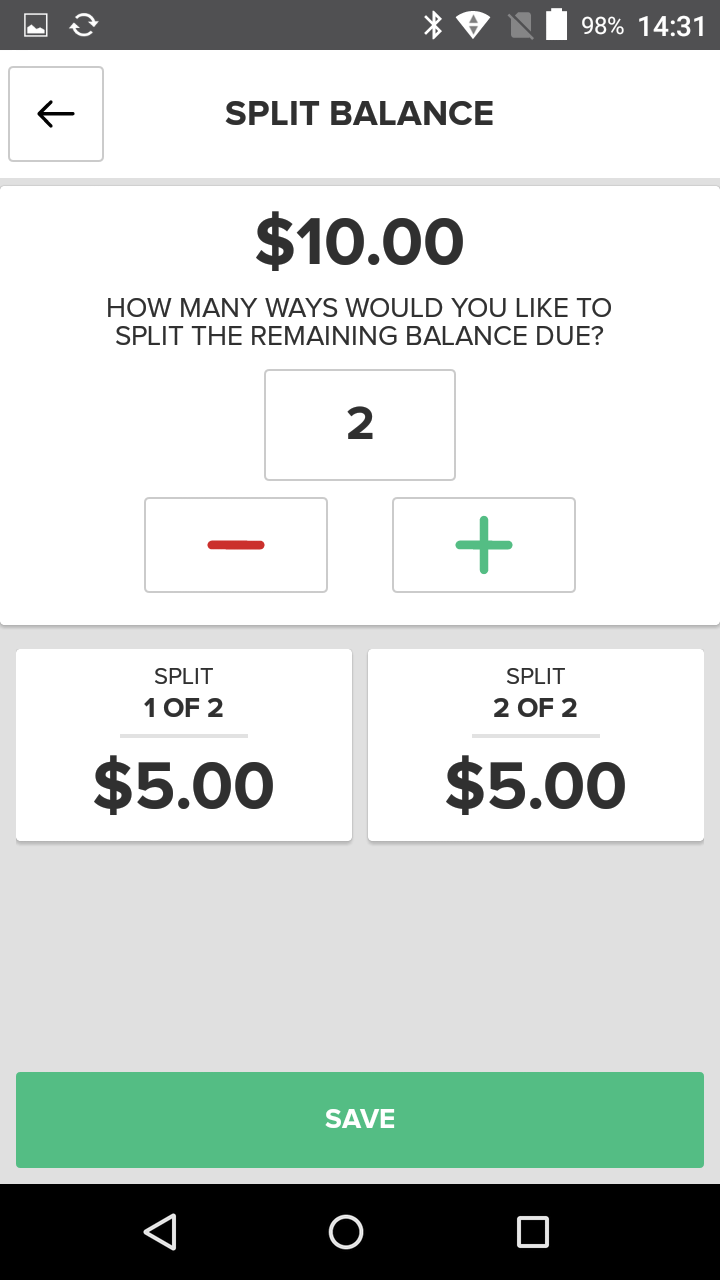
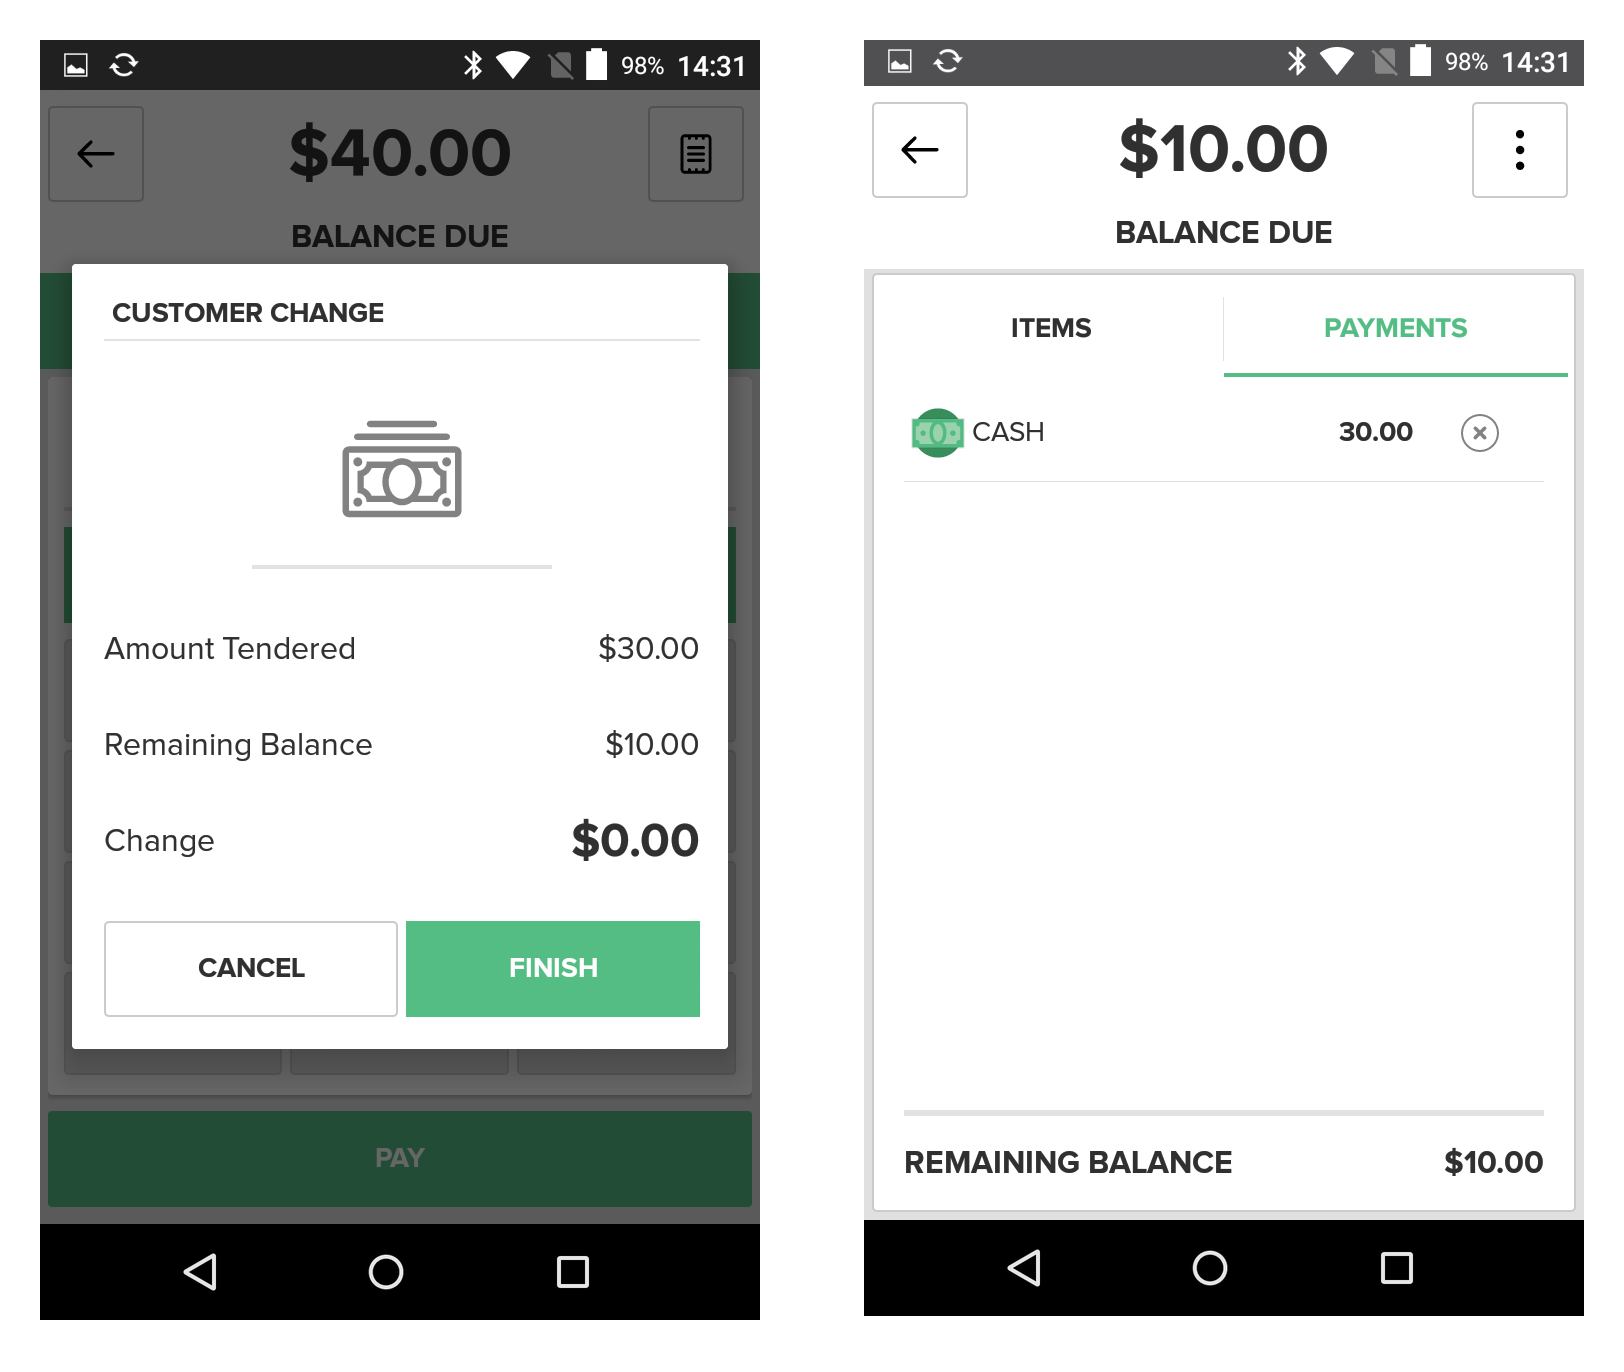
Additionally, you can see any payments that you’ve already applied and the remaining balance. This is handy if a customer wants to pay partially by cash and partially by card.
Employees with proper permissions will be able to view sales history, including cancelled or refunded sales and sales by register.
Management Functions
The POS app also includes a management functions section, where your managers can view register information, print register reports, and manually close batches for the day.
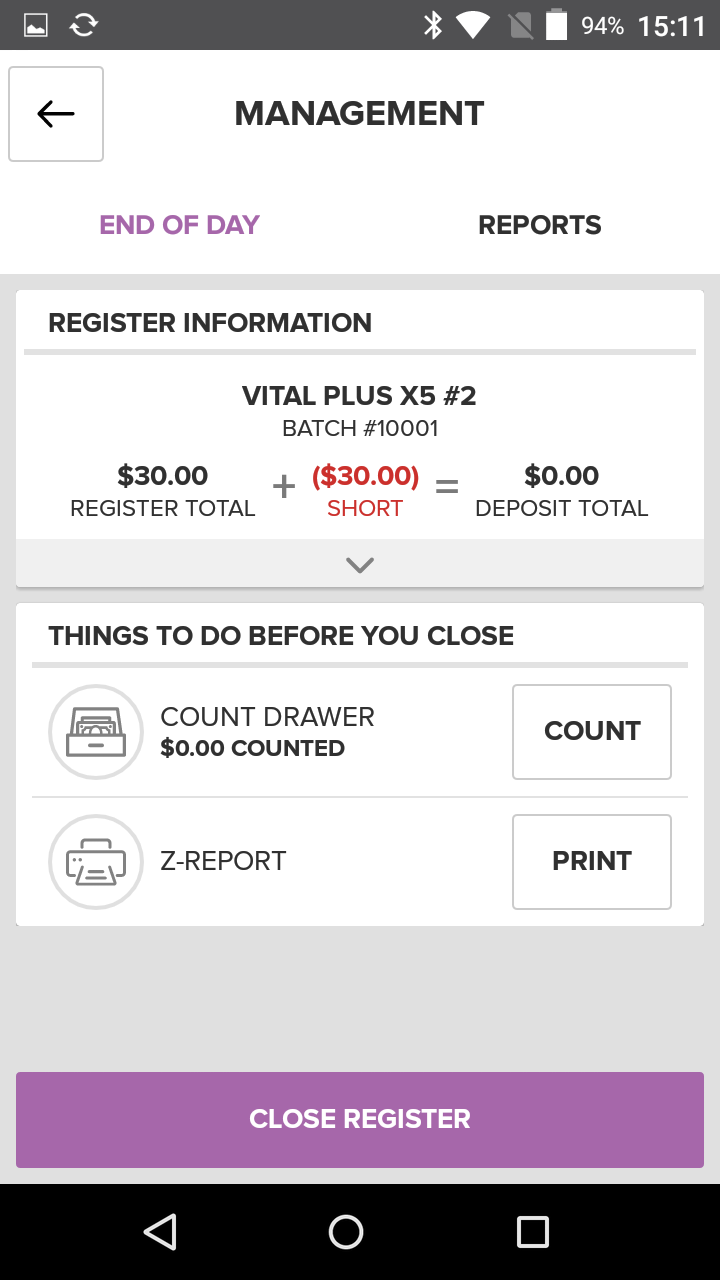
The X5 includes an “End of Day” tab so managers can quickly see what tasks they need to complete (or reports they should review) at the end of the day.
Vital Plus X5 Cost
There are a few costs to the Vital Plus X5: the hardware, a monthly software plan, and credit card processing fees.
The Vital Plus X5 starts at $599. Your processor may charge more or less depending on the specifics of the deal you negotiate.
The monthly software plan starts at $9.99. Again, this varies by processor.
Credit card processing fees vary the most, and there isn’t a good “starting point” to list. That’s because factors like your industry, average transaction size, average monthly volume, and how you accept cards will all play a role in your final rates.
One thing to keep in mind is that Vital systems cannot be reprogrammed. That means that you can only use the system with the processor from whom you originally purchase it. For that reason, we recommend ensuring that you find a good deal on processing and plan to stay with the company for a while.
Vital Plus X5 Credit Card Processing
TSYS Merchant Solutions owns the Vital line, and the devices only work on TSYS’s platform. However, many different processing companies run on TSYS’s platform, meaning there are plenty of ways to obtain a Vital Plus X5 and credit card processing.
If you’re a CardFellow member, you can do that right through us. Not only do we partner with TSYS directly, we work with several companies that are TSYS-compatible. Since CardFellow members have access to great low pricing, independent statement monitoring to ensure you’re not overcharged, and no cancellation fees, you’ll get a great deal when you use a Vital system at your business.
Not a CardFellow member yet? It’s free, and signup only takes a minute. Give it a try and see what you could save on processing costs! Become a member.
Product Features
Selective: TSYS
Credit Card Machines
- Dial-Up
- Dual/Comm
- Wireless
- Wifi
- Contactless
- EMV/ Smartcard
- Built in Contactless Reader
- NFC Capable
- Internal PIN Pad
- Store & Forward
- Multiple merchant support
- Multi application support
- Encrypted
